
How to Create a Polygon (POL) Wallet
Polygon’s fast and cost-efficient transactions make it appealing to crypto enthusiasts. Using this network requires a wallet that is compatible with POL tokens. This guide will walk you through the process of creating a Polygon wallet. We will cover essential terms, step-by-step instructions, and finally, recommend a few wallet providers.
What Is a Polygon Wallet?
A Polygon wallet is a digital storage that allows you to manage Polygon-based tokens. It is used for storing, receiving, and sending coins.
Such wallets function similarly to traditional wallets but exist digitally, secured by cryptography. They contain private keys that provide access to the cryptocurrency you possess.
The native token of Polygon, POL, is an ERC-20 token. It makes POL compatible with all ERC-20-based networks. It can also be stored and transferred through Ethereum wallets and exchanges. However, for quicker and less expensive transactions, mostly POL is used on the Polygon network.
What Is A Polygon Wallet Address?
A Polygon wallet address is a unique ID, which is used to receive tokens on the Polygon network. Anyone you have sent your address to can see it and check through blockchain explorers, but only someone with a private key may access the POL within it.
That address is typically a sequence of numbers and letters that starts with 0x as Polygon is an ERC-20 token. Here's an example of a Polygon wallet address:
0xAbCdEf1234567890AbCdEf1234567890AbCdEf12
It’s highly important to keep your wallet address private, as sharing it with untrustworthy parties could put you at risk.
Also, you should distinguish wallet and contract addresses. A Polygon contract address is a distinct identifier for a smart contract deployed on the Polygon network. You'll likely come across contract addresses while exploring crypto. However, to receive POL directly, you'll definitely need your wallet address.

How To Create A Polygon Wallet?
Polygon itself doesn't have a dedicated wallet, but you can still access the network through various popular crypto wallets, making several simple actions. There’s a guide on how to create a Polygon wallet:
- Pick a wallet provider.
- Create your account.
- Secure your account
- Pass KYC verification if it’s required
- Access and top up your account.
Creating an account and ensuring its security is necessary before setting up a wallet. For instance, on Cryptomus you first need to sign up and choose a strong password. You can then enhance your wallet by activating additional options, such as two-factor authentication, to improve protection.
Not all wallets may automatically connect to Polygon, so you may need to enter specific details, such as a contract address, to add it. All the essential information can be found on the Polygon official documentation.
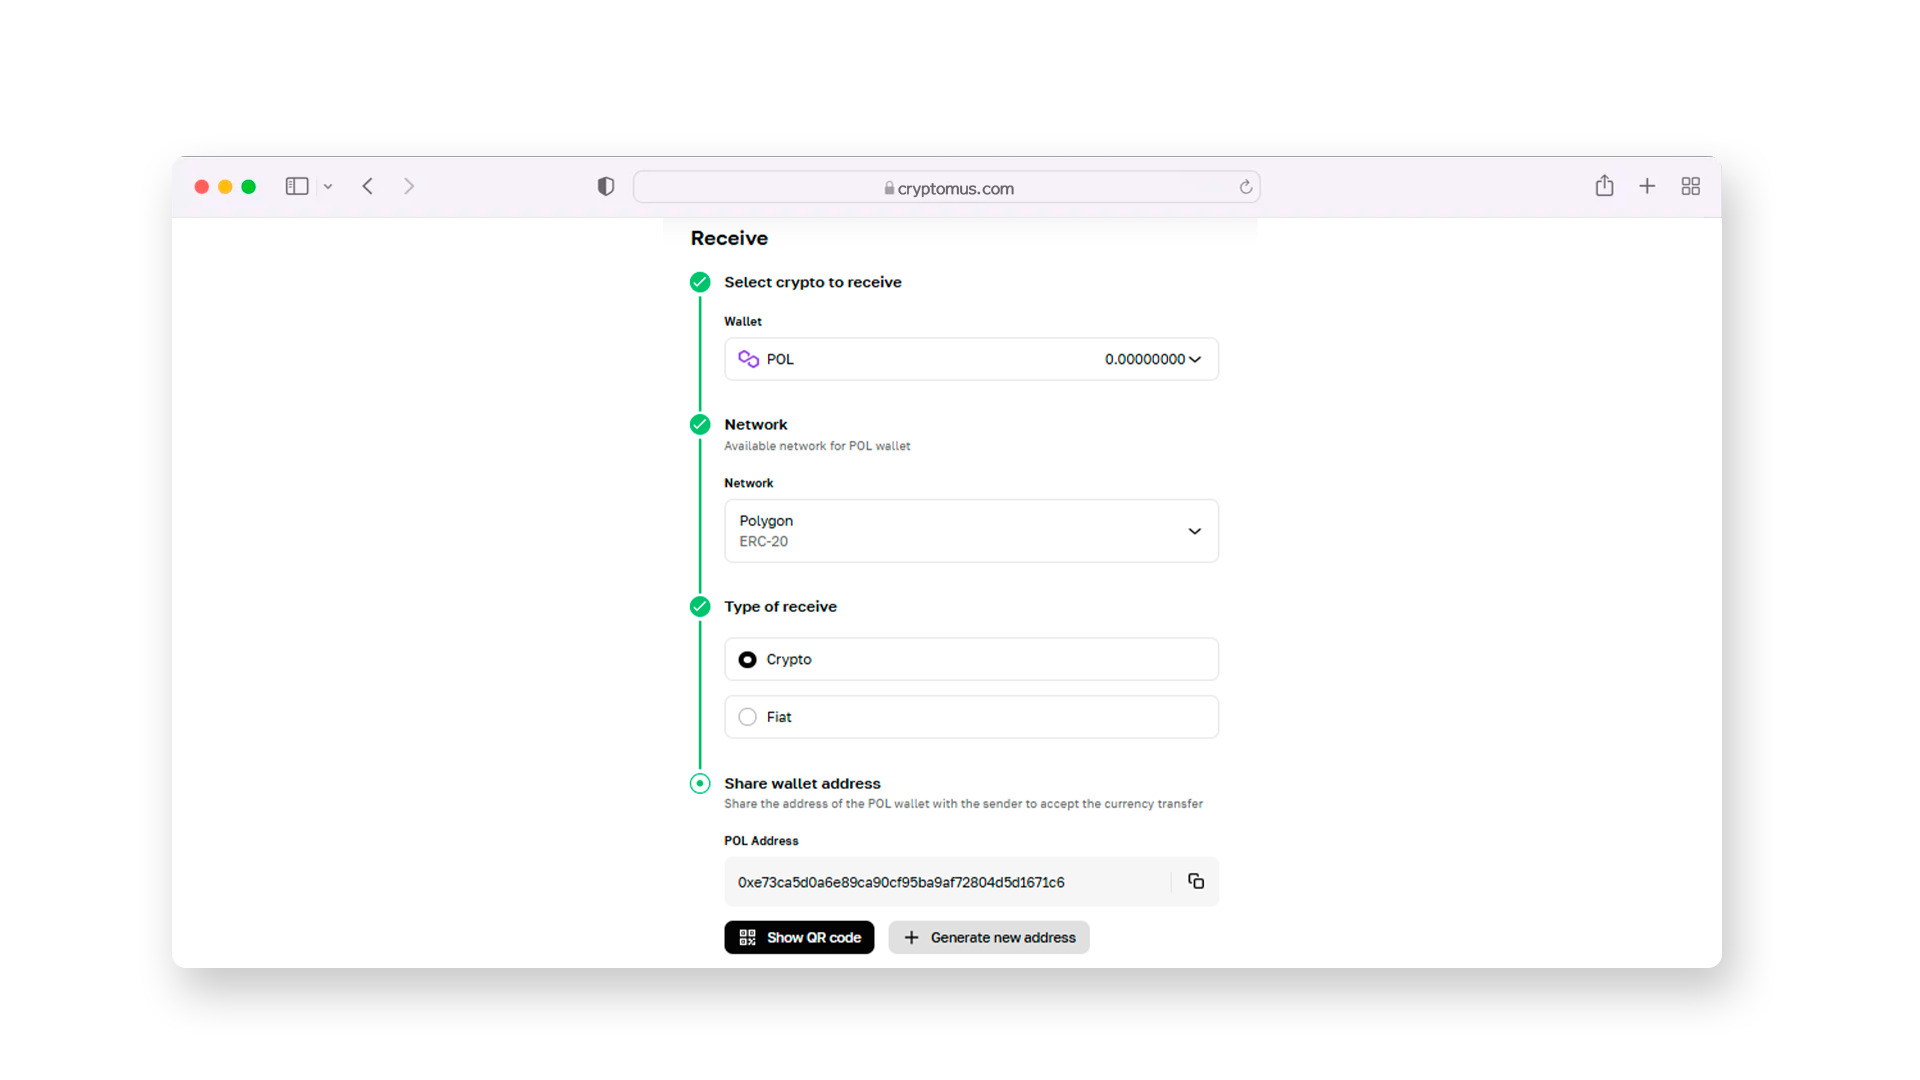
To find your wallet address, go to a "Receive" or "Deposit” section within your wallet, the address will be displayed there. You can copy and share it for receiving Polygon-based cryptocurrencies.
Crypto Wallets That Support Polygon
As for the Polygon wallets, your options fall under these categories:
-
Software wallets: these can be accessed through your PC or mobile. It’s the best option for everyday use.
-
Hardware wallets: such wallets are physical devices that store your funds offline. They are typically viewed as the most secure, but they’re not as convenient for daily usage.
There are multiple providers you could try, and the choice still depends on your priorities. But it’s essential to mention that Cryptomus could be considered the best Polygon wallet for beginners, due to its simple interface, high security, and commission-free transfers within the platform. It also offers a vast scope of financial features you might be interested in.
How To Make Transactions With Your Wallet?
To perform transactions using your wallet, you must be able to send and receive cryptocurrency. To send tokens from a Polygon wallet, do this:
- **Open your Polygon wallet **
- Go to "Send" or "Transfer" section
- Select crypto you’d like to send
- Paste the recipient's wallet address
- Specify the token amount
- Review and confirm
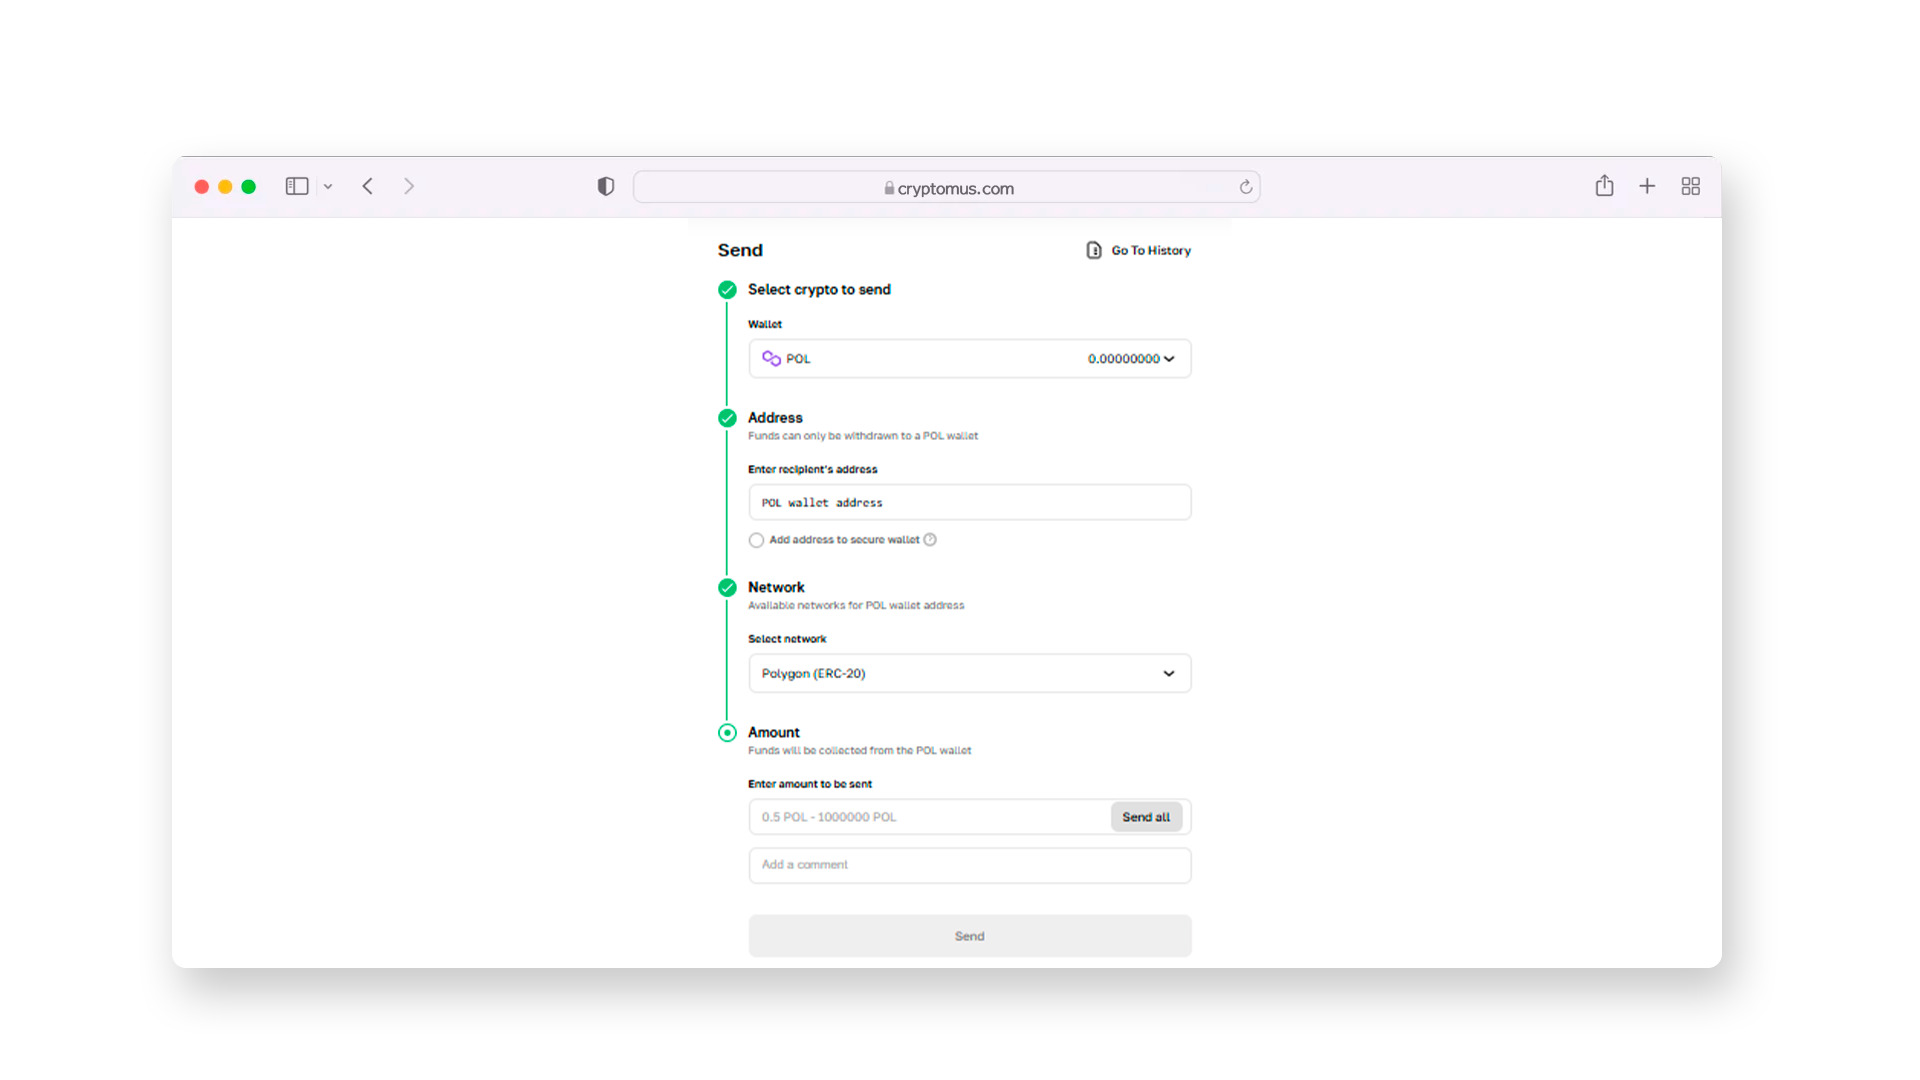
To be able to receive tokens, follow these steps:
- Go to your Polygon wallet
- Move to the "Account" or "Receive" section
- Find your wallet address and copy it
- Share the address with the sender
Congratulations! You should be able to create a Polygon wallet to trade, store, and interact with the POL network, in general. We hope that this article helped you to get started on Polygon.
Feel free to leave your comments, thoughts, questions, and experiences with Polygon down below, and we'll be more than willing to talk with you and engage in dialogue. Let's chat!
Rate the article



comments
0
You must be logged in to post a comment