Julian Thorne
Crypto analyst and guide author. Making complex technologies clear for everyone.
How To Transfer Ethereum To Another Wallet
Table of Contents
Ethereum is one of the most popular cryptocurrencies in the world, and today millions of people use it for various purposes. Transferring coins from one wallet to another is a fairly simple process if you know the correct steps. Below, we will outline the clear steps that will help you quickly and securely send Ethereum to any other address.
How Does an Ethereum Transfer Work?
Before you click the "send" button, it’s important to understand what’s needed for the transfer. To successfully complete the transfer, you will need several things, without which the transaction simply won't happen:
1. Your own wallet. The wallet from which you want to send Ethereum.
2. Recipient's wallet address. The wallet to which you will send ETH. In the Ethereum network, addresses always start with the characters “0x” and consist of 42 characters (numbers and letters). Also, please note that Ethereum addresses are case-sensitive and must be entered correctly in both uppercase and lowercase letters.
3. Funds to pay the network fee. Your account must have a bit more coins than you want to send, to cover the transaction fee. Remember, the higher the load on the network, the higher the fee, so it’s always helpful to check the current fee before sending.

How to Transfer Ethereum from One Wallet to Another?
To send ETH to another wallet, simply follow these few easy steps. Below, we’ll cover five clear stages to help you avoid mistakes.
1. The first step is choosing and setting up your crypto wallet. If you don’t have one yet, you need to create one. A good choice is Cryptomus wallet, which provides a simple and convenient interface for managing ETH. Advanced security measures also protect your funds. After selecting a provider, register on the website and, if required by the platform’s rules, go through the KYC verification.
2. The second step is funding the wallet. You can buy Ethereum on an exchange or via a P2P platform. Remember, you need to buy slightly more coins to cover both the transfer amount and the network fee.
3. The third step is obtaining the recipient's wallet address. Ask the person you are sending money to provide their address. Always check the recipient's wallet address to make sure you copied exactly what you need.
4. The fourth step is initiating the transfer. Go to your wallet, click the “Send” button. Paste the recipient’s address in the appropriate field and enter the amount you want to send. The wallet will automatically calculate the fee and show it to you before sending.
5. The fifth step is confirming the transaction. A summary will appear on the screen showing how much you are sending and how much the fee will be. Double-check everything and click “Confirm.” After that, the program will sign your transaction with a secret key and send it to the Ethereum network, where it will be queued for processing by validators.
How to Track ETH Transactions?
One of the best features of blockchain is complete transparency. You can track your transaction in real time. The best way to do this is by using the Cryptomus Ethereum Explorer. This special website shows everything happening in the network right now.
It’s very easy to use: take the transaction hash (TxID) that your wallet provided after sending the transaction and paste it into the search bar on the site. You can also just enter your wallet address to see the list of all recent incoming and outgoing transactions.
The explorer will show you many useful details:
- Current confirmation status: you will see if the transaction has been completed or if it is still waiting in line.
- Number of received confirmations: this number shows how deep your transfer is “buried” in the blockchain history. The higher the number, the higher the security.
- Paid gas fees: you will be able to know exactly how much Ethereum was spent on the network fee.
- Timestamp: the exact time your transfer was recorded in the blockchain.
- Address details: you can double-check that the money went to the correct address you entered.
If you see the status "Success," it means the transfer is completed, and the recipient can now use the funds. If the status is "Pending," it means the network is busy, and you need to wait a bit more.
How to Transfer ETH to Another Network?
Sometimes situations arise when you need to transfer coins not just to another wallet, but to another network (for example, from the main Ethereum network to networks like Arbitrum, Polygon, or Base). Transferring Ethereum (ETH) or tokens to another network is usually done using a bridge. A bridge is a special service that helps assets “jump” from one blockchain to another.
Here is a simple algorithm on how to do this:
1. Choose the right cryptocurrency bridge. There are official bridges from the networks themselves and convenient third-party services that work faster.
2. Connect your wallet. Go to the bridge’s website and click the connect button. Make sure the correct source network is selected in your wallet.
3. Choose transfer details. Specify where you are transferring from (e.g., Ethereum Mainnet) and where you are transferring to (e.g., Arbitrum). Select ETH coin and enter the amount.
4. Confirm the transaction. You will need to click the confirmation button in your wallet. Keep in mind that there is also a gas fee for using the bridge.
5. Complete the transfer and verify receipt. The transfer through the bridge may take a little longer than usual — from a few minutes to half an hour. Once the process is complete, switch your wallet network to the one you sent the funds to, and check the balance.
What to Keep in Mind When Transferring Ethereum?
To ensure your cryptocurrency experience is a positive one, you should be aware of a few "pitfalls." Security and savings depend on your attentiveness. We’ve gathered the main tips that will help you make transfers like a pro.
1. Always double-check the recipient’s address. Always get the address from a reliable source and check not only the beginning and end but also the characters in the middle of the string. Blockchain transactions are irreversible, and if the money goes to the wrong place, it’s gone forever.
2. Take transaction fees into account. The fee is not a fixed amount; it constantly changes. During times when everyone is trying to transfer, the price goes up. Use gas tracking tools like Etherscan Gas Tracker to see the current gas prices and choose the optimal time for the transfer. If you see that the gas price is too high, wait a few hours or move the transfer to the weekend — the network is usually less congested at that time, and fees drop.
3. Security measures. Use only trusted wallets and platforms with good reputations. Always enable two-factor authentication (2FA) where possible. Never enter your secret phrase on websites you’re not 100% sure about. Be mindful of clipboard hijackers — these are viruses that change the address you copied to the hacker’s address just as you paste it. Always check the screen after pasting the address in the recipient’s field.
4. Pay attention to transaction details. Before final confirmation, make sure you’ve entered everything correctly, like selecting the right network. If you send ETH through the Polygon network to a wallet that only supports the main Ethereum network, the recipient will have a hard time (and sometimes even impossible) finding the funds.
When transferring Ethereum, the most important thing is not to rush, double-check the details, and follow trusted instructions.
We hope our article has helped you understand how to transfer Ethereum from one wallet to another, and if you still have questions, feel free to ask them in the comments.


Simplify Your Crypto Journey
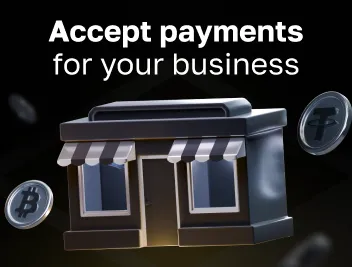
Want to store, send, accept, stake, or trade cryptocurrencies? With Cryptomus it's all possible — sign up and manage your cryptocurrency funds with our handy tools.
Get Started